

Google Chromeで画像上のテキストをコピーしたい…。
それなら拡張機能『Copyfish』が便利だよ!
おはこんばんにちは!ノボルです。
今回は、Google Chromeの拡張機能『Copyfish』の使い方を紹介します。
Copyfishを使えば、画像上のテキストを簡単に取得できますよ。
Chrome拡張機能『Copyfish』の導入方法
インストール
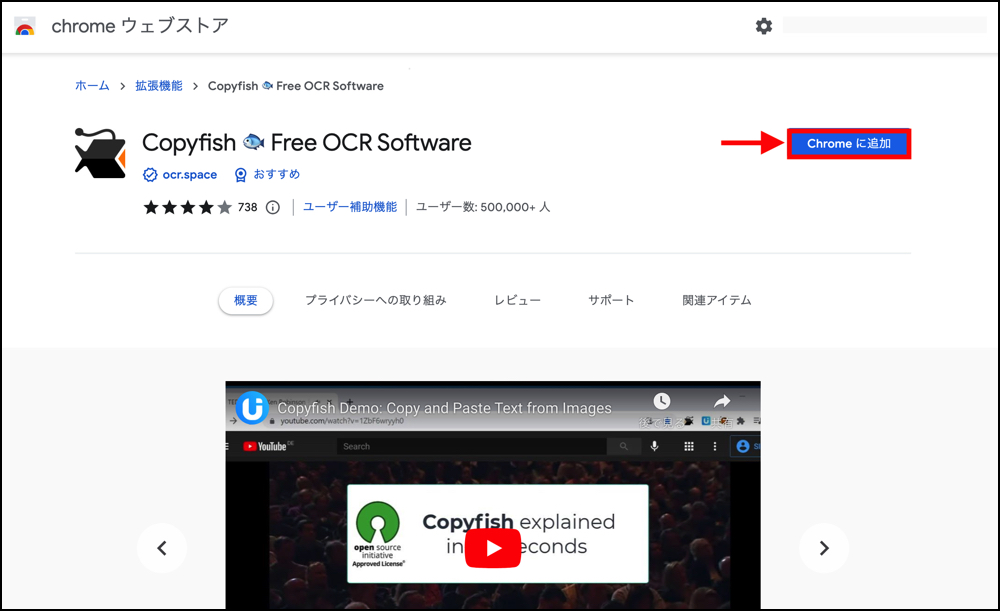
Copyfish公式サイトにアクセスし、[Chromeに追加]をクリック。
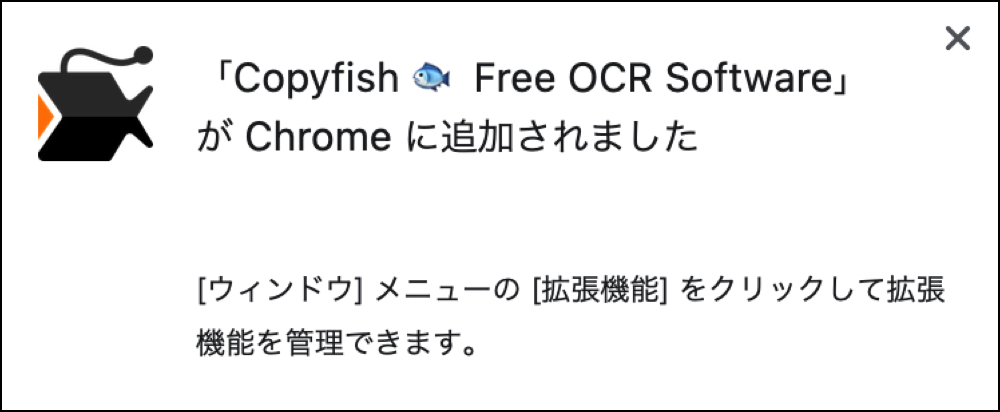
[拡張機能を追加]をクリック。

数秒で追加されるはずです。
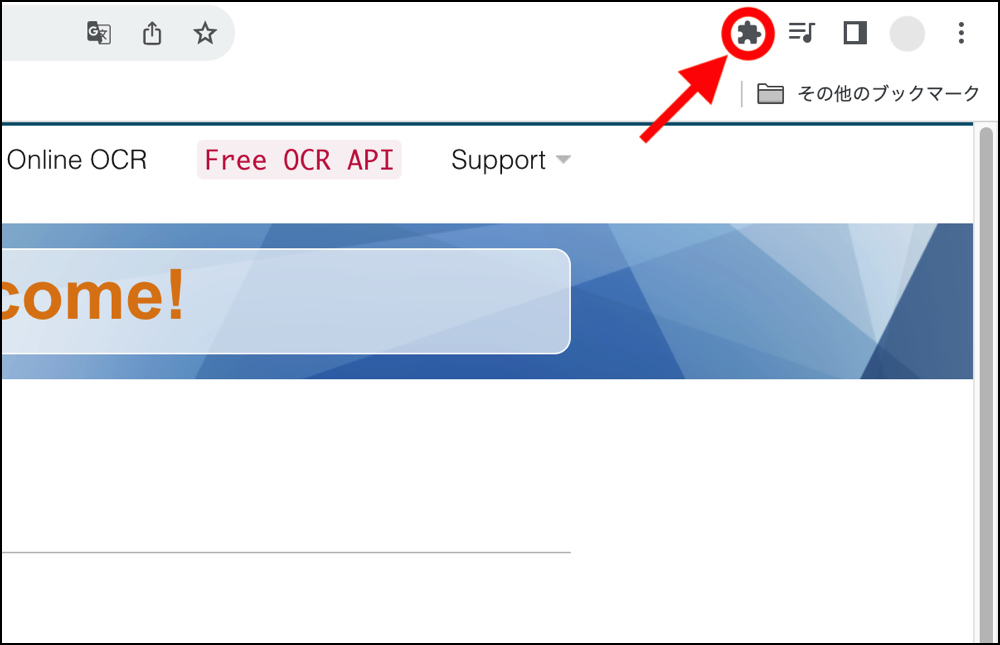
Google Chrome右上のバーから、拡張機能のマークをクリックします。
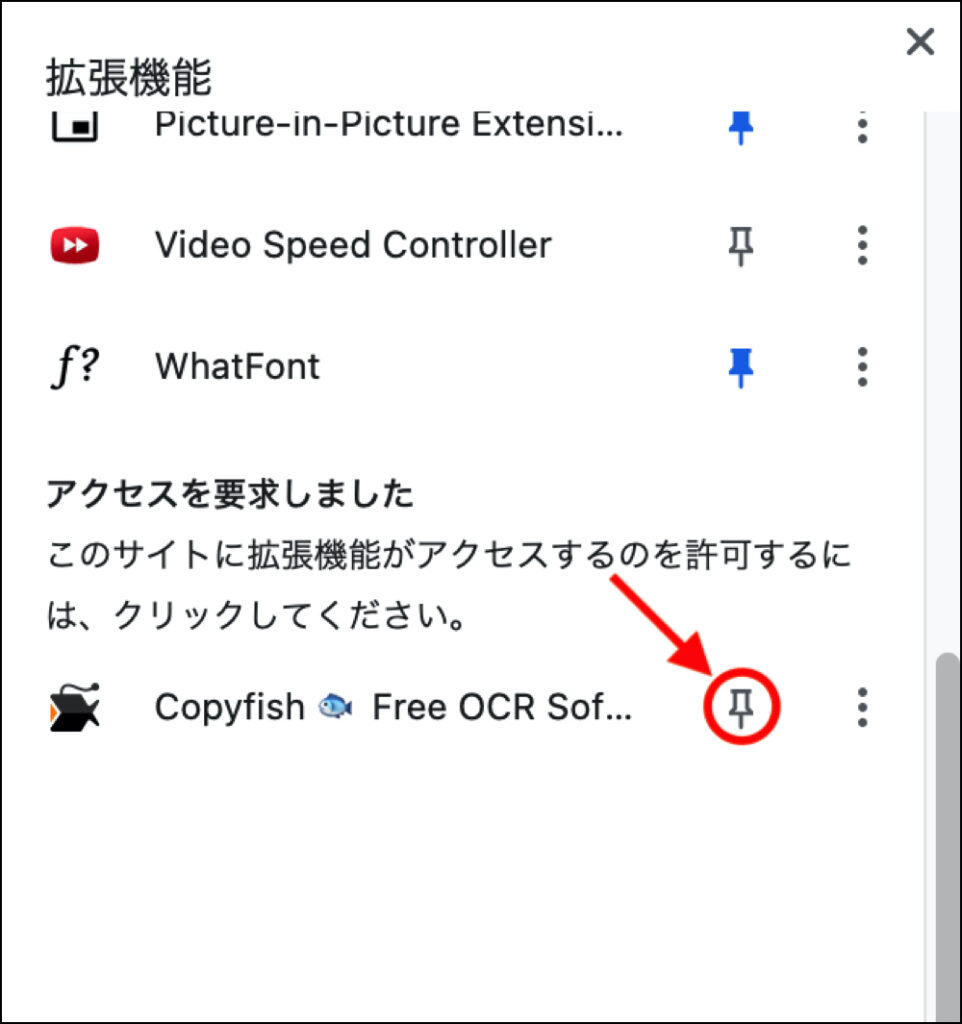
Copyfishのピンマークをクリックし、固定表示させます。
初期設定
Copyfishを右クリックします。
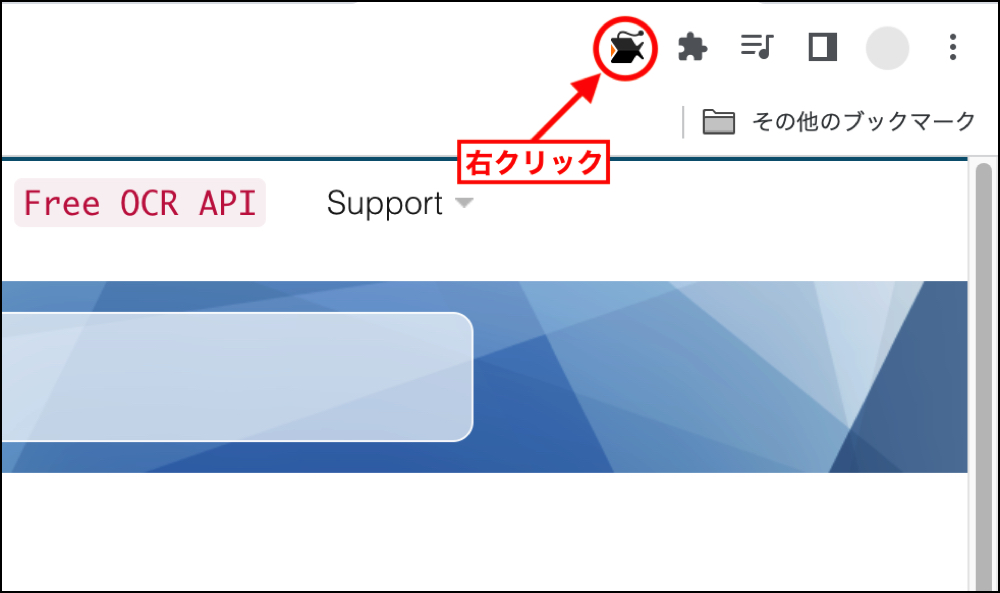
[オプション]をクリック。
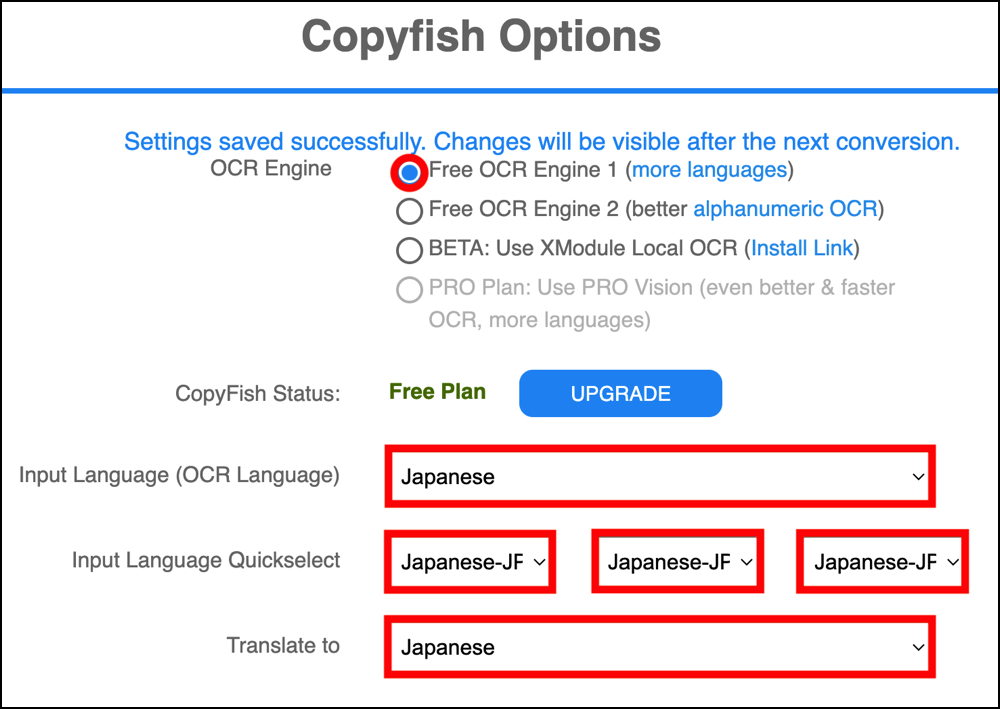
OCR Engineと言語を、画像の通りに設定しましょう。
使い方
Copyfishの使い方は、シンプルです。
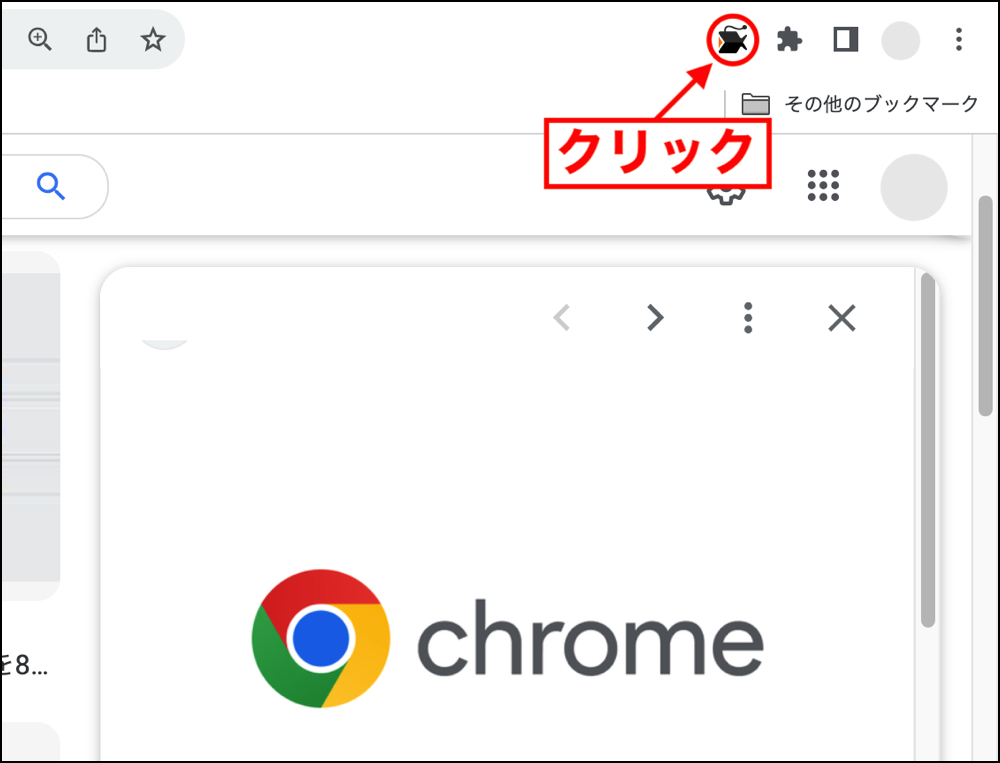
テキストを取得したい画像を開いた状態で、Copyfishのマークをクリック。
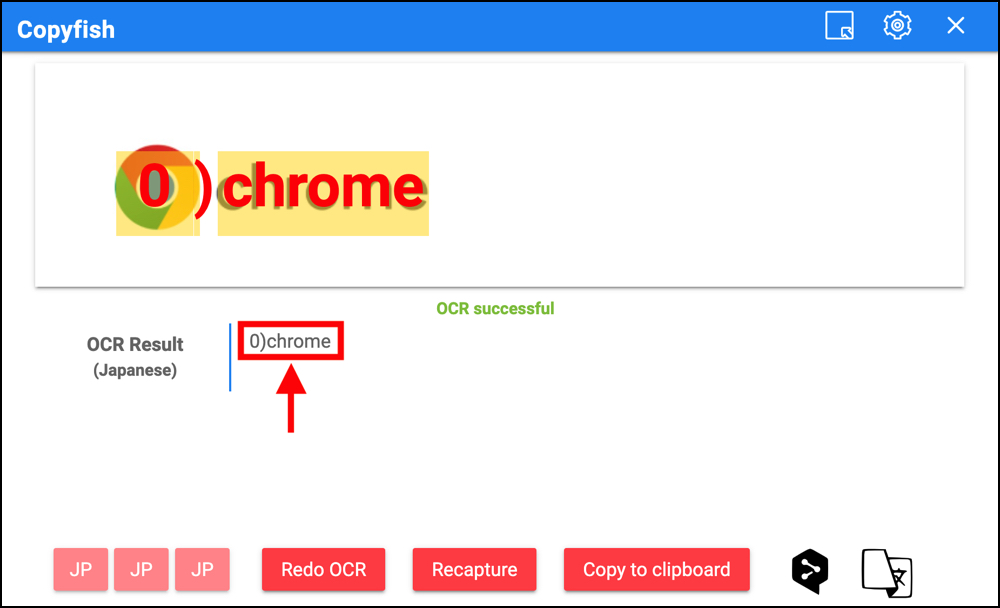
画像のテキスト部分をクリックしながら囲います。
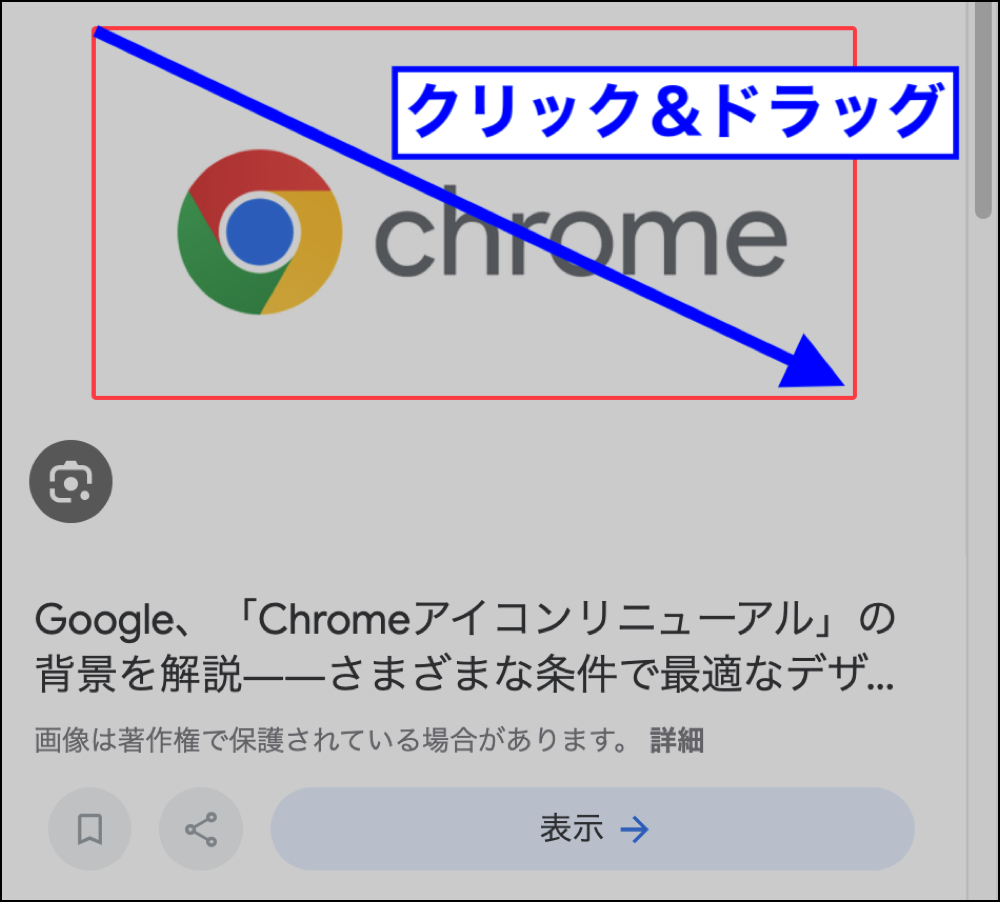
自動的にテキストが抽出されます。
まとめ
この記事では、Google Chromeの拡張機能『Copyfish』の導入方法を解説しました。
Copyfishを使えば、画像上のテキストを簡単にコピーすることができるので、ぜひ活用してみてください。


コメント